Losing important files can be a distressing experience, especially when they are accidentally or mistakenly deleted and seemingly vanish forever. However, in the realm of technology, where data recovery tools and techniques continue to advance, hope is not lost. In this article, we delve into the intricacies of file recovery in Windows 11, unveiling the methods and tools available to help you retrieve those seemingly irretrievable files.
Whether it’s a critical document, cherished photographs, or irreplaceable memories, the prospect of recovering permanently deleted files can be a lifeline in dire situations. While the notion of permanently deleted files may sound daunting, it is important to understand that in many cases, the data may still reside within the depths of your computer’s storage system, awaiting a chance to be revived.
Join us on this enlightening journey as we explore the methods, techniques, and best practices that can help you recover those seemingly lost files. Whether you are a novice user or an experienced tech enthusiast, this article is your guide to navigating the intricate world of file recovery in Windows 11 and reclaiming your valuable digital assets.
To recover your precious data from your Windows 11 you need a powerful ally. An ally which stands by you. This powerful software is Stellar Data Recovery which will empower you in recovering the lost data. This robust software is designed specifically to retrieve lost or deleted files from various storage devices, offering a lifeline when all hope seems lost. Simply download the software from the official website.
Simple steps, Powerful Results.
Stellar Data Recovery makes file recovery simple, so you don’t need to be an IT professional to use it. You can rapidly navigate through the programme and start the recovery process with only a few clicks thanks to its user-friendly interface. It removes the complication and allows you to concentrate on recovering your essential data. Here is the step-by-step guide.
Step 1: Download and Install Stellar Data Recovery:
Visit Stellar Data Recovery’s official website and download the programme for your Windows 11 PC. Run the installation file and follow the on-screen directions to install the programme on your computer after the download is complete and start the software from the destination folder, desktop or simply from the start menu.
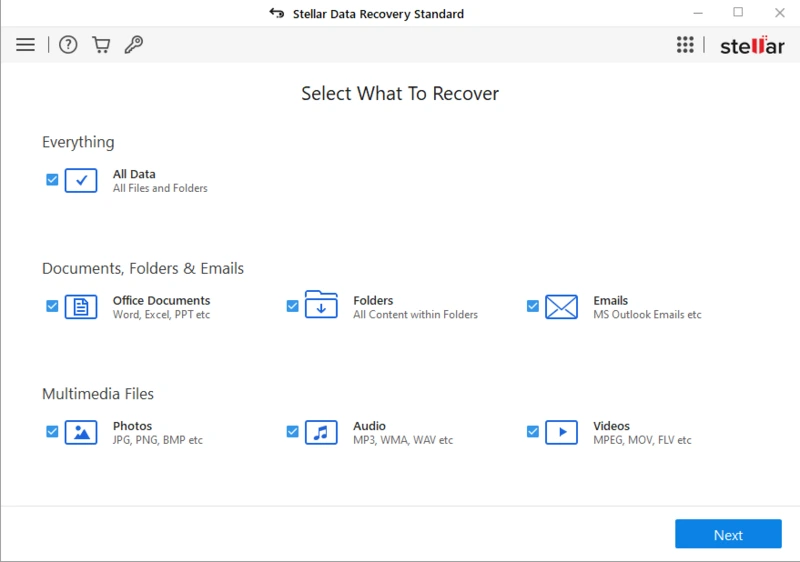
Step 2: Select the Type of Data You Want to Recover:
Once you have downloaded and run the software, a very user-friendly interface will open in which you’ll be asked to select those files you want to recover. These files include your documents, videos, Photos, Audios and others. You can also choose any specific file format, if you have any specific file format in mind.
Step 3:Select the scan location:
After selecting the file type, the next step is to select the location from where you want to recover the files, this may include the drive which has lost your data. It can be your system drive or any other external drive like USB or any other portable device.
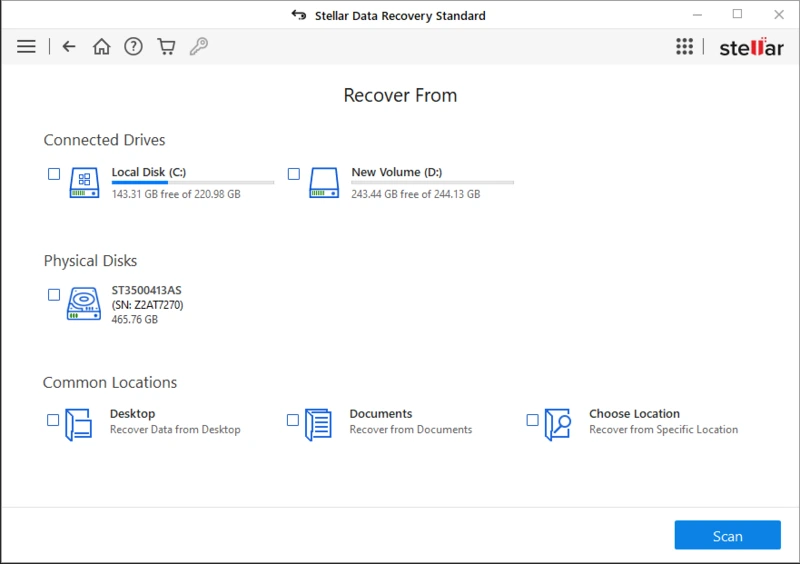
Step 4: Start the scanning process:
The next step is to initiate the scanning process. For this just press the “Scan” button and the scanning process will start and the software will display the progress on the screen.
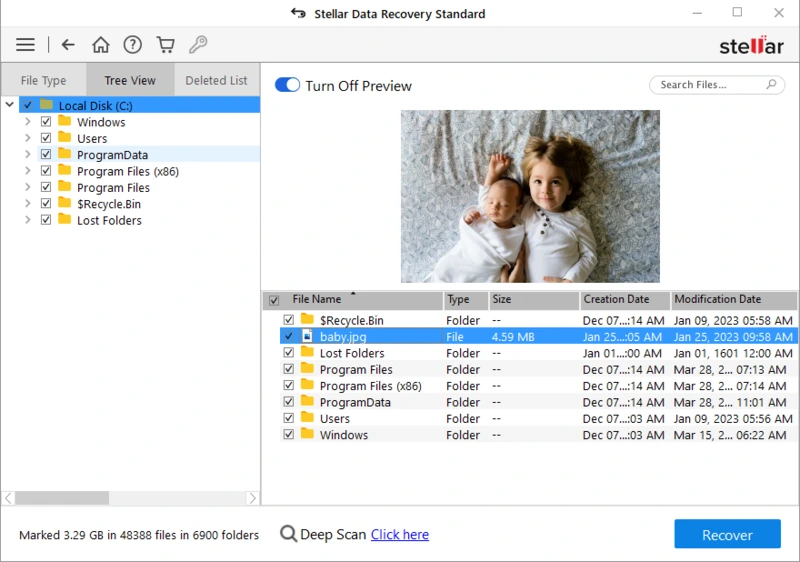
Step 5: Preview and Select the File for Recovery:
Once the scan is completed there will be a list of files which can be easily recovered, you can navigate through them and select a file you want to recover and you can use the preview feature to look into the contents of the files. This will allow you to select the specific file easily.
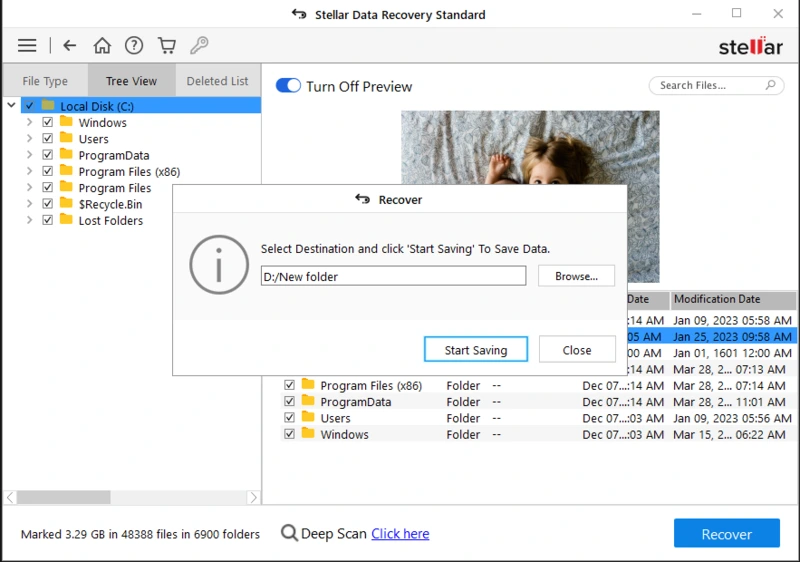
Step 6: Start the Recovery:
After selecting the file you can start the recovery process, for this you can click on the ‘Recover’ button to initiate the recovery process. Choose the destination folder where the recovered file can be kept safely. Stellar Data Recovery will start recovering the selected files and will display the progress on the screen, the time for the recovery will depend on the type,size and numbers of the selected file. Once the process has completed the software will display the summary of recovered data.
Step 7: Obtain the Restored Files and Check Them.
Navigate to the folder where you have recovered the files and check their integrity. Open the files and ensure that the files are not corrupted. If you encounter any problem rerun the software for those specific files
Reclaiming the Lost Treasure
Using the Stellar Data Recovery programme, you were able to effectively recover your destroyed files. To avoid data loss in the future and to guarantee the security of your files, always remember to routinely backup your vital data.
Conclusion: When we delete a file on our devices, it may seem like it’s gone forever, but it’s not that dark. At first it would seem that everything is over but there is always hope. The deleted leaves traces behind, these deleted files remain on our hard drives until it gets replaced by new data. This data can be saved in time if we take the right step. The Right step is Stellar Data Recovery .
Stellar Data Recovery is the leading recovery software in the market which has been serving its users for over two decades. It is the one of the most stable and demanding software solutions that can recover permanently deleted files from various device storages including, hard drives, SSDs, USB devices and many more. It contains a complete range of features that make the recovery process quick and easy.