
If your Mac is showing any sign of slowing down then the very first thing before you try anything else is check for the total free space available on the mac. And if the total free space is less than 10% of your total space then you need to first free up some space on your mac. And the best way to do that is remove the duplicate files from your mac that are unnecessarily eating up the precious disk space.
In this article we will guide you on how to find and remove these duplicate files from your mac. So without further delay, let’s start.
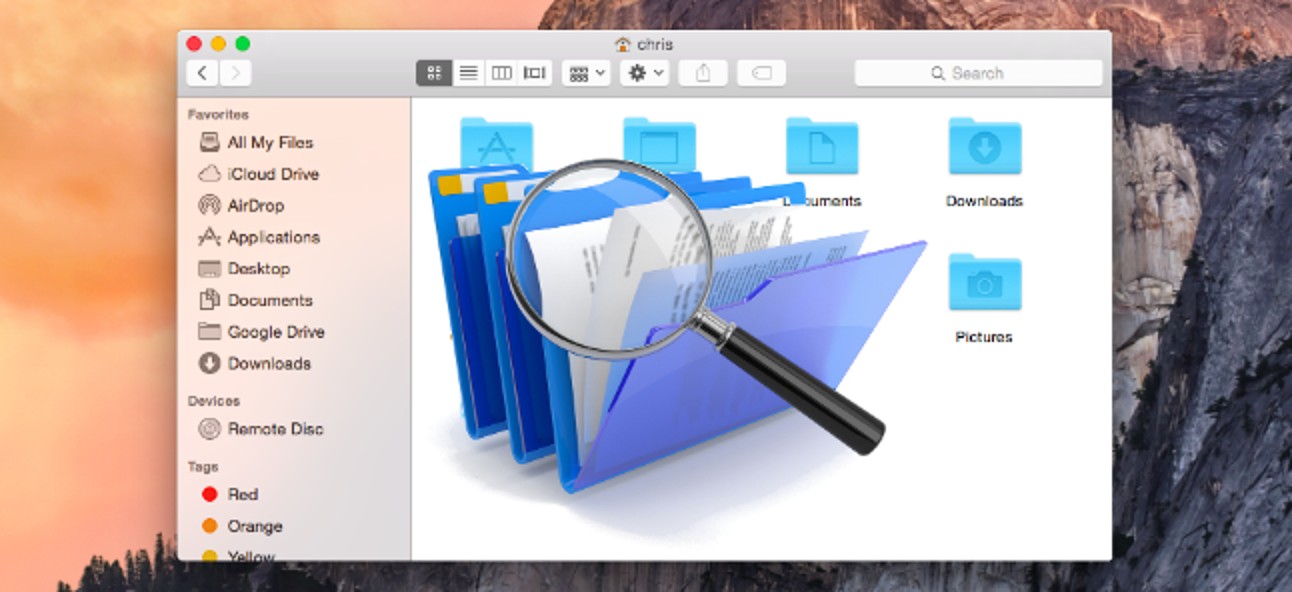
Finding and Removing Duplicates Manually from Mac
Duplicate files can be in any of your folders, therefore manually going inside each folder and searching for duplicates can be an uphill task. But thanks to the Smart Folder feature in Finder that has simplified this task.
Let’s now check out how to find and delete duplicate files on Mac using Finder Smart Folders
- To get started first of all open the Finder app on your Mac.
- Next navigate to File > New Smart Folder, by clicking on the File tab and selecting New Smart Folder from the drop down menu.
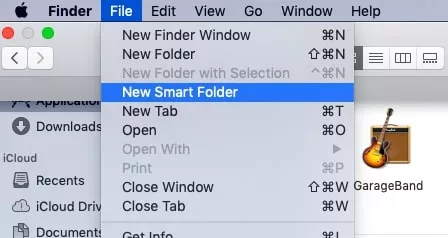
- Now, click on the ‘+’ button located at the top-right corner.
- You can now search for photos, music, videos, documents or various other file types. The primary key here is how you sort the results. Sorting them by name will fetch you some duplicates that you pick easily.
- We recommend you to check the date of the file to confirm that it is really a duplicate file, as you never ever wish to delete an original file.
Now, while this manual way of deleting the file is completely free to use, however it will rarely provide you the desired results. Also, this method requires a lot of time, energy and efficiency.
Therefore, instead of wasting your time in the method that does not even provide you the accurate result we suggest you use a duplicate file finder on mac instead.
Remove Duplicate Files by Duplicate File Finder on Mac
As we have discussed above, the manual method to remove duplicate files is not only time consuming but will also never provide you with the desired and guaranteed results. On the contrary using the manual method, there is always a chance that you end up deleting the original files along with the duplicate files.
Also, if you have duplicates in almost all the folders of your Mac then the manual process can take up several days to complete.
So folks to avoid all such situations we recommend you to use a duplicate file finder for Mac that automatically scans your entire mac for the duplicates and lets them delete with just a click. Duplicate Finder and Remover developed by Systweak is one such duplicate file finder for Mac that removes all types of duplicate files from your mac with just a few clicks so that you can recover disk space that was formerly occupied by the duplicates.
Let’s check out how to use this duplicate file finder on mac to remove duplicate, along with its other promising features.
- To start with, first get Duplicate Finder and Remover app from the Mac App Store. The app currently only costs you $8.99 which is 70% discount on the regular price of the app.
- After getting the app install it on your Mac.
- Once you have installed the app, double click on the app icon to launch the Duplicate Finder and Remover app.
- Now add the folders or the location or the files to the app that you wish to scan for duplicates.
- Once you are done adding up the files or folders to the scan list of the app, the next step is to click on the Scan Now button to start the scanning process of finding the duplicates.
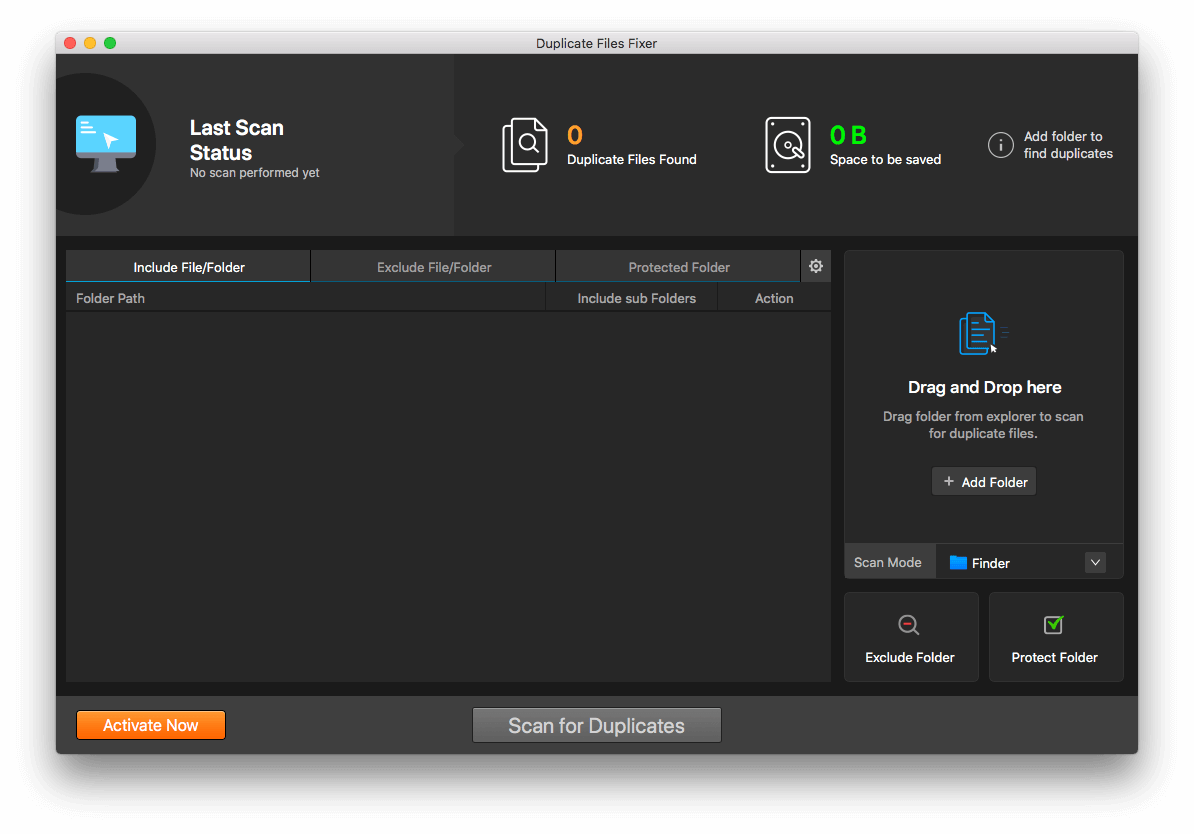
- Within a few minutes the app will list all the duplicates that exist on the folder you have added to the scan list. It will also show the number count of the total files scanned, duplicates found and the space occupied by these duplicates.
Note: Although the app has a fast scan engine, but still the time taken to complete the scan will depend on the number of files that you are scanning along with the configuration of your mac - Once the scan is complete, you can preview the result shown by the duplicate file finder on mac.
- Next you have two options, one is going through the duplicate list and manually marking the duplicates, and the other one is the Auto-Mark option that automatically marks duplicates in each group leaving the best match unmarked. This saves your time and efforts.

- Now once you have auto marked the duplicate files, the final step is to remove them from your mac. To do so click on the Move To Trash button to move all the duplicate files to the Trash of your mac.
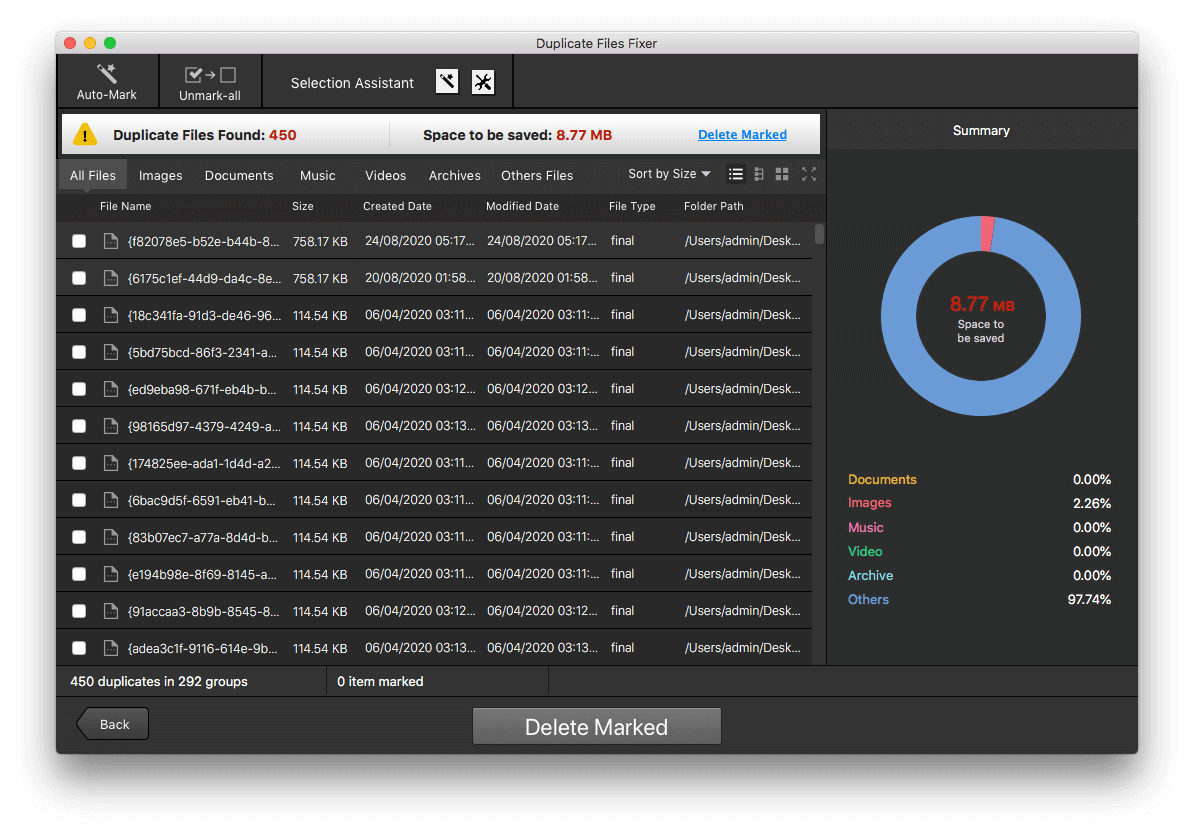
- And finally empty your Trash to remove the duplicates permanently from your mac.
That’s it. This is how easily and swiftly you have removed all the duplicate files from your mac.
Wrapping Up
So readers this is all from our side. We hope that the article has helped you on how to delete duplicate files on your mac so that you can regain the space and performance which is affected by the duplicate files.